Pages

Friday, December 28, 2012

Restrict the ability to switch to the root user


Having the ability to be come root is great, but if the wrong person gets the root password then bad things can happen. So lets make it a little harder on them. In the steps below I'm going to make the the su command unusable to a normal user. First we will remove the permissions for other. Then changing the group ownership to sysadmin so only users in the sysadmin group (gid 14) can su and become root.

Change permissions and group ownership on the su command
# cd /usr/bin
# ls -la su

-r-sr-xr-x 1 root sys 21192 Dec 28 12:30 su
# /usr/bin/chgrp syadmin su
# /usr/bin/chmod 04750 su
# ls -la su

-rwsr-x--- 1 root sysadmin 21192 Dec 28 12:30 su

Now lets change the su.static file. # cd /sbin
# ls -la su.static

-r-sr-xr-x 1 root sys 21192 Dec 28 12:30 su
# /usr/bin/chgrp syadmin su.static
# /usr/bin/chmod 04750 su.static
# ls -la su.static

-rwsr-x--- 1 root sysadmin 21192 Dec 28 12:30 su.static


Thursday, December 27, 2012

Restict SSH logins

As a System Administrator you always want to make your servers more secure. With that being said I'm going to restrict ssh logins. To do this, I will make a change to the /etc/ssh/sshd_config file. This change will limit the ability of accounts to login using ssh to only accounts in a the users group. The example below is from a Solaris 10 server, but this will still work on any UNIX, BSD and Linux system. We have done this on Solaris 10, RHEL 5 and SLES 11 servers at my work place.


Before you begin,  login to the server using a remote console or at least more then one terminal. I had one co-worker lock himself out of the server because he forgot to add himself to the users group before he restarted ssh. I would also take note of any programs that use ssh so you don't lock them out.

# vi /etc/ssh/sshd_config
Add the following line to the /etc/ssh/sshd_config file. AllowGroups users You can use any group you want, you don't have to use the users group. Often you will find that many people like to use the group sshusers for this function. I use the default group users, because all the user accounts use SSH to access my servers. Make sure you check all you application accounts and make use they are the in the group that are using for SSH. otherwise your applications may no longer work.

To have the changes take affect you need to restart the sshd process. # svcadm restart ssh or # /etc/rc2.d/K03sshd stop
# /etc/rc2.d/K03sshd start


Test the the new setup by trying to login with one accout not in the users group and one that is. The account that is in the users group should be able to login, but the account that is not should not.

 If you have anything to add please post below.

Tuesday, December 4, 2012

Uninstall and delete a zone in Solaris 10

This is how to completely remove a non-global zone from a Solaris 10 server. For the example below the global zone is called earth and the zone we are removing is called moon.

Check the current status of the zones running on the global zone.
root@earth> zoneadm list -cv
ID NAME STATUS PATH BRAND P
global running / native shared
moon running /export/zones/moon native shared


If the zone is running, then run the following command to shutdown the zone.
root@earth> zoneadm -z moon haltNote - You can also login to the zone and shut it down from inside the zone.

After the zone is shutdown it should be in the installed state. Run the command below to uninstall the zone.root@earth> zoneadm -z moon uninstall

Then you delete the zone with the command below.
root@earth> zonecfg -z moon delete

The site below also has a nice how to for removing zones.
http://www.tech-recipes.com/rx/889/solaris-10-uninstall-and-delete-a-zone/

Thursday, October 11, 2012

Make Firefox load ILOM pages

I had this issue where Firefox wouldn't load ILOM pages right. I've also noticed that I'm not the only one with this issue. So I'm posting this little how-to for people who are still struggling with this. Basically the content section of the ILOM webpage will not display.

For those who don't know ILOM stands for Integrated Lights Out Manager. It is a web interface that helps you remotely manage servers. This interface is good for monitoring hardware issues and can can send out SNMP traffic. The ILOM can also give you console access. Meaning that you get a console or window that stays connected even during a reboot. Basically it is as if you are physically standing in front of the server with a keyboard and monitor.

Each user will have to add the following file to their home directory.
In ~/.mozilla/firefox/profile_id.default/chrome add a file called userContent.css@media print {
}

@namespace url(http:www.w3.org/1999/xhtml);
#mainpage { visibility: visible !important; }

Note - The profile_id.default will be the only file with .default at the end in the firefox directory. You may have to create the chrome directory.

I originally posted this fix at the forum linked to below, under the user name cyberninja.
https://forums.oracle.com/forums/thread.jspa?messageID=10283552
I also provided this fix to Oracle tech support and if you put in a trouble ticket to My Oracle Support this is the solution they will provide you. So in other words, this is the Oracle supported fix.

I have a second part to this post, where I fix a connection issue between the chassis and their blades.

Tuesday, October 2, 2012

Run Commands Remotely on Multiple Servers

Have you ever had to run the same command on several servers? It takes a lot of time to login to each server and then run a command or group of commands. There is also the possibility for errors, so I wrote this note to remind myself how to do this, if ever I need it. To get the most from this post you need to have your SSH agent working. If your SSH agent is not working don't worry the script below will still work, but you will have to login to each server on your list as the script moves along.

I'm going to use a real world example to explain how to run commands on many servers. I often have to do security checks on my servers. Many of the checks I do consist of checking file permissions and ownership. An easy enough check, but it can take time if you have to check more then 10 servers. So with that being said, we are going to check ownership and permissions on the /etc/resolve.conf file. I will using a space theme for the terminal examples in this guide. The user account is man and the servers are earth, moon, mars and saturn

Lets get started by testing the command we are going to use.
man@earth> ssh moon ls -l /etc/resolve.conf
-rwxr-xr-x  1 root  root  20 Oct  6  2011 /etc/resolv.conf
man@earth>

Ok above I logged into moon and ran the ls -l command and the result was printed to the screen. After the command executed the connection to moon was disconnected and you are returned to earth.
Test the in a script.man@earth>for s in moon
> do
> ssh -q $s ls -l /etc/resolve.conf
> done
-rwxr-xr-x  1 root  root  20 Oct  6  2011 /etc/resolv.conf
man@earth>

Let me explain what is going on in the script above. The line for s in `moon` makes s a variable. So when the 3rd line says ssh -q $s it is seen as ssh -q moon, by the computer. The -q option for ssh stops any ssh banner from displaying. Which will make seeing the out put from several servers much easier to see.

Open your favorite text editor and create the file below and call it check.
#!/bin/bash
servers="moon mars saturn"
for s in $servers
do
ssh -q $s uname -n
ssh -q $s ls -l /etc/resolve.conf
done

Now lets test the check script.
man@earth> bash check
moon
-rwxr-xr-x  1 root  root  20 Oct  6  2011 /etc/resolv.conf
mars
-rwxr-xr-x  1 root  root  20 Oct  6  2011 /etc/resolv.conf
saturn
-rwxr-xr-x  1 root  root  20 Oct  6  2011 /etc/resolv.conf
man@earth

Now the output shows the script logging into moon 2 times and running uname -n and then the ls command. Then followed by output from mars and saturn.

Note - By typing bash in front of a BASH script you can execute the script without making it executable.

To make the script a little more useful I'm adding a server list file called servers. I will also append the output of the commands to a file called result, on the server (earth). The final script is below.

Example of the servers file
moon
mars
saturn


The final script
#!/bin/bash
for s in `cat servers`
do
ssh -q $s uname -n >> result
ssh -q $s ls -l /etc/resolve.conf >> result
done


I hope this helps someone

Monday, October 1, 2012

Overview of the ldapclient command

I have seen a lot of forum posts on the web asking for help on with this command. So I writing this post so I can help people understand the basic process of getting a Solaris server to authenticate to a LDAP server, using the ldapclient command. This post is not a "how to" for ldapclient command.


Synopsis
/var/sbin/ldapclient [-v | -q] [init | manual | mod | list | uninit | genprofile]

ldapclient sub-commands
The init sub-command for the ldapclient utility is used to initialize the client server, using a profile stored on an LDAP server.
The manual sub-command for the ldapclient utility is used to manually setup the LDAP client.
The mod  sub-command for the ldapclient utility is used to modify the configuration of the LDAP client that was setup manually.
The list  sub-command for the ldapclient utility shows the current LDAP client configuration.
The uninit sub-command for the ldapclient utility basically blows away your setup so you can start again.
The genprofile sub-command is used to generate  a LDIF file that can then be loaded into the LDAP server.

Any files modified during setup will backed up to /var/ldap/restore. Theses files are typically modified during setup are:
/etc/nsswitch.conf
/etc/defaultdomain (if it exists)
/var/ldap/ldap_client_file
/var/ldap/ldap_client_cred

The last to files above are created by ldapclient.

Steps to getting a Solaris client to work with a LDAP server.
1) Gather information that will be used, like IP addresses and host names.
 Note - You should capture the variables for the command before you run it. You will need it later.
2) Run ldapclient manual
3) If needed ldapclient mod

4) Test LDAP user accounts. this means login as the user.
5) If accounts works, then run the ldapclient genprofile command witch will create a ldif file. If you kept the full command from steps 1 or 2, just replace the word manual and/or mod with genprofile and run the command. Load the ldif in the LDAP server. This ldif file creates the the profile and agent entries.
6) If the proxy agent and profile are working, then all you need to do is run ldapclient init on all new Solaris clients.

Now as I said earlier this not a how to. This just a simple overview of the ldapclient command.
I hope this helps someone.

Thursday, September 27, 2012

Forwarding Display

These are my notes on how to forward a display on a UNIX based operating system.

For this example we will useing the names home & remote for our servers. Home is the starting sever and remote is the server your logging into and displaying the app back to the home server. rich@home# ssh -X remote Can also use -Y instead of -X. This is more secure then the method described below.

Some work places don't allow X forwarding so you have to use the DISPLAY variable. rich@home# xhost + remote
server2 being added to access control list
rich@home# echo $DISPLAY
:1.0
rich@home# ssh remote
rich@remote# export DISPLAY=home:1.0
At this point you can now forward your display. Export DISPLAY works with BASH and KSH. Use setenv DISPLAY for CSH. Take a note of the fact that this 2nd way of forwarding your display is insecure. 

Reference
How to export display from Linux to FreeBSD

Wednesday, September 26, 2012

Creating Zones in Solaris 10

Zones are a feature of Solaris 10, which provide a form of visualization. When used with containers they can also provide flexible application isolation. A container is a method of controlling resources. I will not be going over containers in this guide. All Solaris 10 servers have a Global zone, which can host three types of zones. The three zone types are: Spare Root, Whole Root and Branded zones.

A Global zone is a physical machine or host for the other zones. This zone can effect or control the other zone types, but the global zone is protected from changes on hosted zones. The Whole Root zone is a almost full copy of the Solaris 10 OS in self contained area on the global zone. Any system files you have installed on the global zone will also be installed on the Whole Root zone as well. Where as the Spare zone, is a zone that shares the four of the main file systems with the the Global zone.


Solaris 11 also uses zones but it does it differently. The zones in Solaris 11 are similar to Branded zones in Solaris 10. If you want to build Solaris 10 Branded zones or Solaris 11 zones. This guide may not be as helpful to as a guide that covers branded or Solaris 11 zones zones.
Solaris 11 also uses zones but it does it differently. The zones in Solaris 11 are similar to Branded zones in Solaris 10. If you want to build Solaris 10


Topics covered
1. Creating Zones on Solaris 10
2. Fixing sudo
3. Creating local account


For the purpose of this guide. We will use the hostname, earth for our Global zone (host). We will create a zone named moon and a user named man. So in other words will but a man on the moon. We will also use shared interfaces for our networking.


Part 1: Creating Zones on Solaris 10
Zone creation (must be root)
root@earth> zonecfg  –z  moon
zonecfg:moon> create -b
zonecfg:moon> set zonepath=/export/zones/moon
zonecfg:moon> set autoboot=true

The -b option after create sub-command makes the zone a Whole Root. Leave it off if you want Spare zone. The zonepath setting tells the zonecfg command where to install the zone. The autoboot setting is optional but if don't set it to true, the zone may not come back up if you reboot the global zone. You will need to manually boot the zone.

Configuring the network interfaces
zonecfg:moon> add net
zonecfg:moon:net> set address=10.0.10.41/24
zonecfg:moon:net> set physical=rtls0
zonecfg:moon:net> set defrouter=10.0.10.1
zonecfg:moon:net> end
The /24 sets the subnet mask and is optional. Repeat the last step for every additional interface you need to configure.

Note you might want to run the ifconfig –a command on the global zone to see what interfaces you have configured.

Optional, check setup.
zonecfg:moon> info
zonepath: /export/home/moon
autoboot: true
pool:
limitpriv:
scheduling-class:
ip-type: shared
net:
        address: 10.0.10.41
        physical: rtls0
        defrouter: 10.0.10.1

Finish up
zonecfg:moon> verify
zonecfg:moon> commit
zonecfg:moon> exit

Install zone
root@earth> zoneadm -z moon  install
A ZFS file system has been created for this zone.
Preparing to install zone moon.
Creating list of files to copy from the global zone.
Copying 82181 files to the zone.
Initializing zone product registry.
Determining zone package initialization order.
Preparing to initialize 783 packages on the zone.
Initialized 783 packages on zone.
Zone moon is initialized.
Installation of 1 packages was skipped.
The file contains a log of the zone installation.

Boot the zone
root@earth> zoneadm -z moon boot

Check the zone
root@earth> zoneadm list -cv
ID NAME     STATUS      PATH                      BRAND      IP
0   global        running        /                                  native          shared
-    moon        installed       /export/zones/moon    native          shared

Log into zone and finish zone setup.
root@earth> zlogin -C moon
The  –C  option will give you console access to the zone.

Select a Language

  0. English
  1. es
  2. fr
Please make a choice (0 - 2), or press h or ? for help: 0
Enter 0

Select a Locale
  0. English (C - 7-bit ASCII)
  1. Canada (English) (UTF-8)
  2. Canada-English (ISO8859-1)
  3. U.S.A. (UTF-8)
  4. U.S.A. (en_US.ISO8859-1)
  5. U.S.A. (en_US.ISO8859-15)
  6. Go Back to Previous Screen
Please make a choice (0 - 6), or press h or ? for help: 0
Any of these are fine, here I will chose 0

What type of terminal are you using?
  1) ANSI Standard CRT
  2) DEC VT52
  3) DEC VT100
  4) Heathkit 19
  5) Lear Siegler ADM31
  6) PC Console
  7) Sun Command Tool
  8) Sun Workstation
  9) Televideo 910
  10) Televideo 925
  11) Wyse Model 50
  12) X Terminal Emulator (xterms)
  13) CDE Terminal Emulator (dtterm)
  14) Other
Type the number of your choice and press Return:   13
Pick 13, don’t pick 12 it will crash the zone. (at least it does with my setup)

Enter the zones hostname

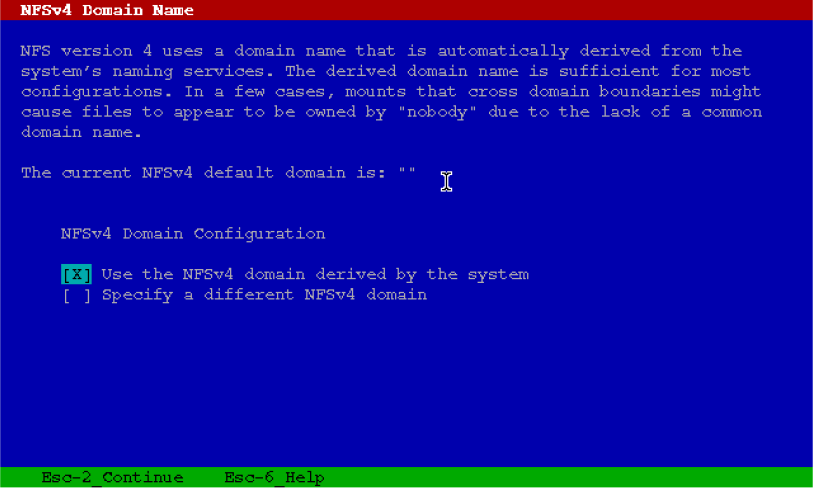
Below I have highlighted the answers I use on each screen.


After setting the root password the system will reboot

Log in as root

Fixing sudo
For some reason sudo sometimes will not work after the zone comes up. Do the following command to fix root. From the inside the new zone
# ldd /usr/local/bin/sudo
libpam.so.1 =>     /usr/lib/libpam.so.1
libdl.so.1 =>      /usr/lib/libdl.so.1
libintl.so.8 =>    /usr/local/lib/libintl.so.8
libsocket.so.1 =>  /usr/lib/libsocket.so.1
libnsl.so.1 =>     /usr/lib/libnsl.so.1
libc.so.1 =>       /usr/lib/libc.so.1
libcmd.so.1 =>     /lib/libcmd.so.1
libiconv.so.2 =>   /usr/local/lib/libiconv.so.2
libsec.so.1 =>     /usr/lib/libsec.so.1
libgcc_s.so.1 =>     (file not found)
libmp.so.2 =>      /lib/libmp.so.2
libmd.so.1 =>      /lib/libmd.so.1
libscf.so.1 =>     /lib/libscf.so.1
libgcc_s.so.1 =>     (file not found)
libavl.so.1 =>     /lib/libavl.so.1
libdoor.so.1 =>    /lib/libdoor.so.1
libuutil.so.1 =>   /lib/libuutil.so.1
libgen.so.1 =>     /lib/libgen.so.1
libm.so.2 =>       /lib/libm.so.2
/platform/SUNW,Sun-Blade-T6300/lib/libc_psr.so.1
        /platform/SUNW,Sun-Blade-T6300/lib/libmd_psr.so.1
The two lines that are bold need to have their links fixed. Run command below to fix.

# ln -s  /usr/sfw/lib/libgcc_s.so.1  /usr/lib/libgcc_s.so.1
# ldd /usr/local/bin/sudo

libpam.so.1 =>     /usr/lib/libpam.so.1
libdl.so.1 =>      /usr/lib/libdl.so.1
libintl.so.8 =>    /usr/local/lib/libintl.so.8
libsocket.so.1 =>  /usr/lib/libsocket.so.1
libnsl.so.1 =>     /usr/lib/libnsl.so.1
libc.so.1 =>       /usr/lib/libc.so.1
libcmd.so.1 =>     /lib/libcmd.so.1
libiconv.so.2 =>   /usr/local/lib/libiconv.so.2
libsec.so.1 =>     /usr/lib/libsec.so.1
libgcc_s.so.1 =>   /usr/lib/libgcc_s.so.1
libmp.so.2 =>      /lib/libmp.so.2
libmd.so.1 =>      /lib/libmd.so.1
libscf.so.1 =>     /lib/libscf.so.1
libgcc_s.so.1 =>   /usr/lib/libgcc_s.so.1
libavl.so.1 =>     /lib/libavl.so.1
libdoor.so.1 =>    /lib/libdoor.so.1
libuutil.so.1 =>   /lib/libuutil.so.1
libgen.so.1 =>     /lib/libgen.so.1
libm.so.2 =>       /lib/libm.so.2
        /platform/SUNW,Sun-Blade-T6300/lib/libc_psr.so.1
        /platform/SUNW,Sun-Blade-T6300/lib/libmd_psr.so.1
This should fix sudo.
Note: For the user to be able to use sudo they need to belong to the sysadmin(14) group.

Create a local account
# mkdir –p /export/home
# useradd -u 2056 -g 2001 -G 14 -m -d /export/home/man -g gid -s /bin/bash man
# passwd man
New Password:
Re-enter new Password:
passwd: password successfully changed for man
~. will take you out of the zlogin console.

Now your zone is complete. Login to the zone as the new user and test sudo. If all everything is working then your done. This post is a little long. maybe I should have broken it up. If you have any questions please comment below.

Other related posts
Uninstall and delete a zone in Solaris 10
Faster Solaris 10 Zone Creation
Set the Default Route on Solaris
Add Zone Function to Solaris 10 Core build
How-to change the IP address on a Solaris server

Tuesday, September 25, 2012

Setup no password sudo on RHEL

Sudo is a great tool if you want to run programs with elevated permissions. The problem is that by default you have to enter a password to run the commands. In this post I show you how to set up sudo in RHEL 5, so select users don't need to enter a password.


Open your favorite text editor and edit /etc/sudoers. Change the following lines to match what is below.
visudo
## Allows people in group wheel to run all commands
%wheel ALL=(ALL)  ALL

## Same thing without a password
%wheel ALL=(ALL) NOPASSWD: ALL
Note - I found that you have to uncomment both of the items above, if you are using a gnome desktop. When only the bottom option is set, the the gnome admin apps will not launching, even after you enter the root password in the pop-up. So if you are not using the admin GUI apps then just uncomment the bottom.

Next add the user to the wheel group.
usermod -G wheel  user
The -G option adds the user to the wheel group. If you use -g instead the sysadmin group will be added as the primary group.

Now your user should be able to use sudo without having to use a password.

Simular pages on this blog:
Use sudo without a password

Friday, September 14, 2012

How-to change the IP address on a Solaris server

This post is a how to, for changing an IP address on a Solaris operating system. I will show you how to change the IP address and sudnet mask for both a global zone and a full root zone. For the examples on this page I will be using the Solaris 10 operating system. The global zone will be called earth and the zone will be called moon.


Solaris 10 
root@earth> ifconfig [interface] x.x.x.x/x
The /x at the end is used to set the netmask and is optional. If the netmask is not set Solaris will use the default /24 for a class C address, if the IP address is a class C address.

root@earth> ifconfig [interface] plumb x.x.x.x/x up
This command sets the IP adddress and brings up the interface.

Note this is not a permanent fix. The server will revert back to the old IP address after a reboot. To prevent this, perform the steps below.
root@earth> echo x.x.x.x/x > /etc/hostname.[interface]

Add the IP address and hostname to the /etc/hosts file.

Use this command to restart the service instead of rebooting the server.
root@earth> svcadm restart network/physical

Change the IP address of a Solaris 10 zone.
The steps above can be used to change the IP address from within the zone. Though if the NIC is controlled by the global zone, ie a shared interface. Then steps below will show you how to change the IP address of the zone, from the global zone.
root@earth> zonecfg -z moon
zonecfg:moon> select net address=x.x.x.x/x
zonecfg:moon:net> set address=x.x.x.x/x
zonecfg:moon:net> set physical=[interface]
zonecfg:moon:net> set defrouter=x.x.x.x/x
zonecfg:moon:net> end
zonecfg:moon> verify
zonecfg:moon> commit
zonecfg:moon> exit


You may have to remove the the old IP address first. If so follow the steps below.
root@earth> zonecfg:moon> remove address=x.x.x.x/x
zonecfg:moon> add net
zonecfg:moon:net> set address=x.x.x.x/x
zonecfg:moon:net> set physical=[interface]
zonecfg:moon:net> set defrouter=x.x.x.x/x
zonecfg:moon:net> end


Now reboot the zone and check the zone status.root@earth> zoneadm -z moon  reboot
root@earth> zoneadm list -cv
ID NAME STATUS PATH BRAND IP
global running / native shared
moon running /export/zones/moon native shared


I hope this helps someone. If you have an suggestions or questions please post below.


Thursday, September 6, 2012

Use sudo without a password

These are my notes for setting up users so they can use sudo without a password. This how-to is for a system that already has sudo installed on a server. Basically what I'm doing here, is giving a group the ability to use sudo without a password and then assigning users to that group.

To edit the sudoers file, use the command below.
# visudo

Add the following line.
sysadmin ALL=(ALL) NOPASSWD: ALL
In this example the sysadmin group can now sudo without needing to use a password, but any group can be used.

Note - I use the sysadmin group for Solaris and the wheel group for RHEL & SLES.

Add the user rich to the sysadmin group.
# usermod -G sysadmin man
The -G option adds the user man to the sysadmin group. If you use -g instead the sysadmin group will be added as the primary group.

Following the steps above should now give access to sudo without needing to enter a password. If you have any questions or comments please post below.

Simular pages on this blog:
Setup no password sudo on RHEL